 12m (39ft)
 This takes the obvious zig-zag corner, hard to start.
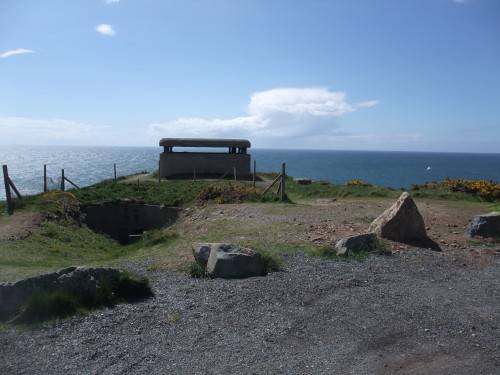
Herpin Rock Area
How do I get there?
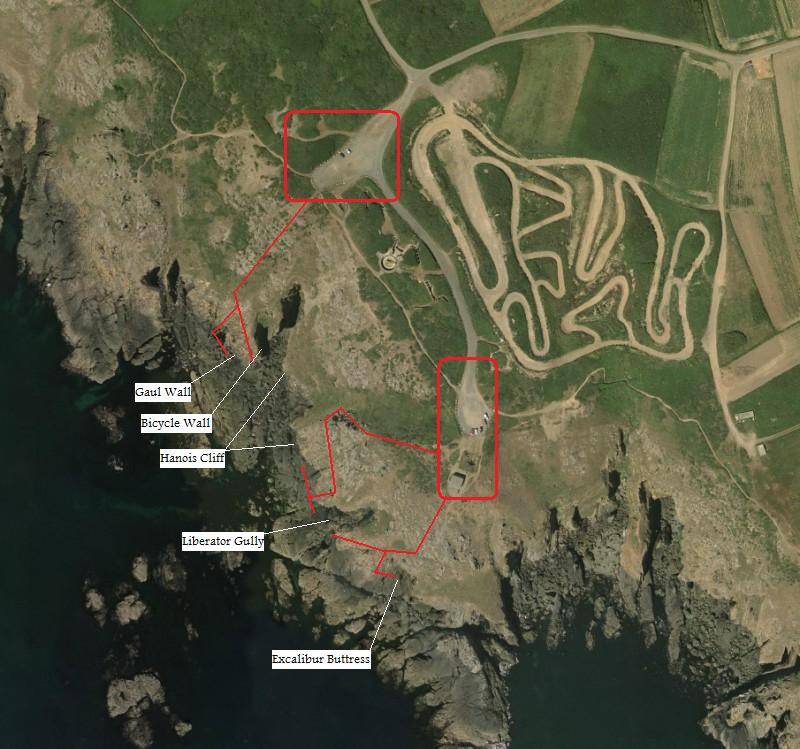
Carpark location
After parking by the bunker with the balanced roof in the photo above, scramble down past the rocky outcrop on the right as you look directly out from the bunker. Skirt across the top of the crag leftwards as you look out until you come to a platform with a downclimb onto the ledge nearer sea level. Liberator Gully drops down on the right, and Hanois Cliff is a short walk northwest.
Below are links to topos of the climbs at Hanois Cliff:
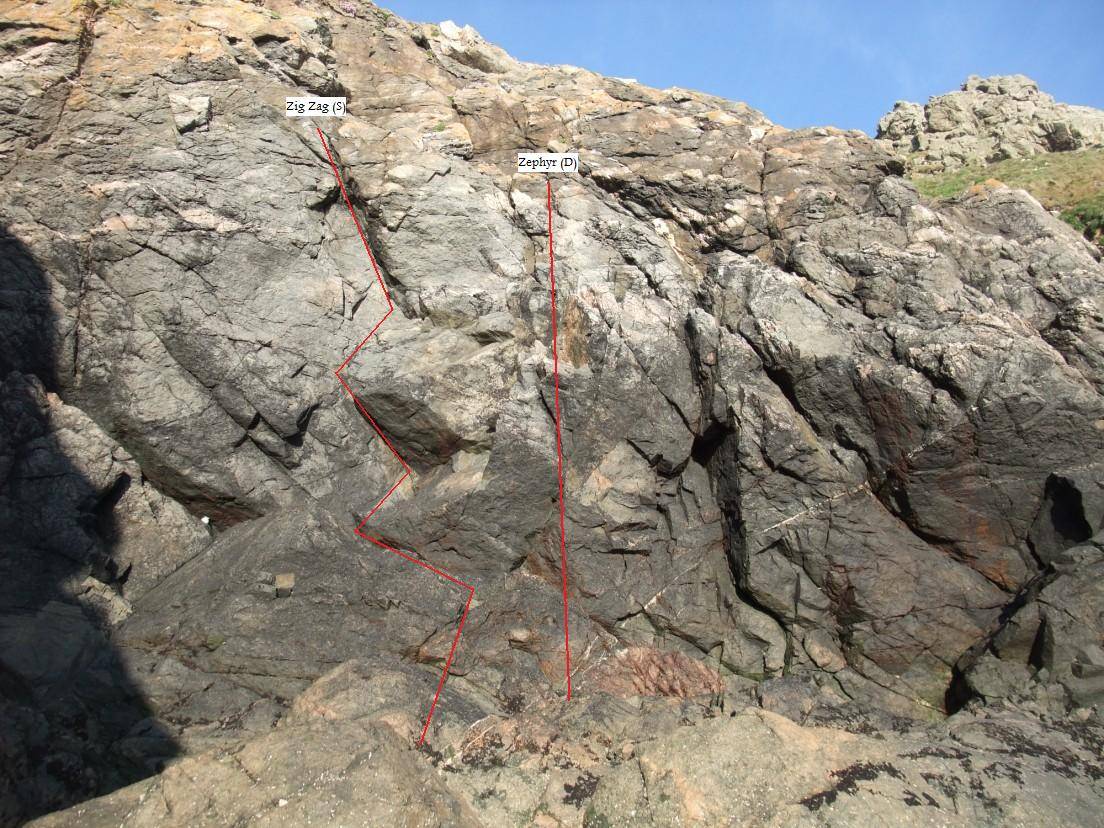
Topo A
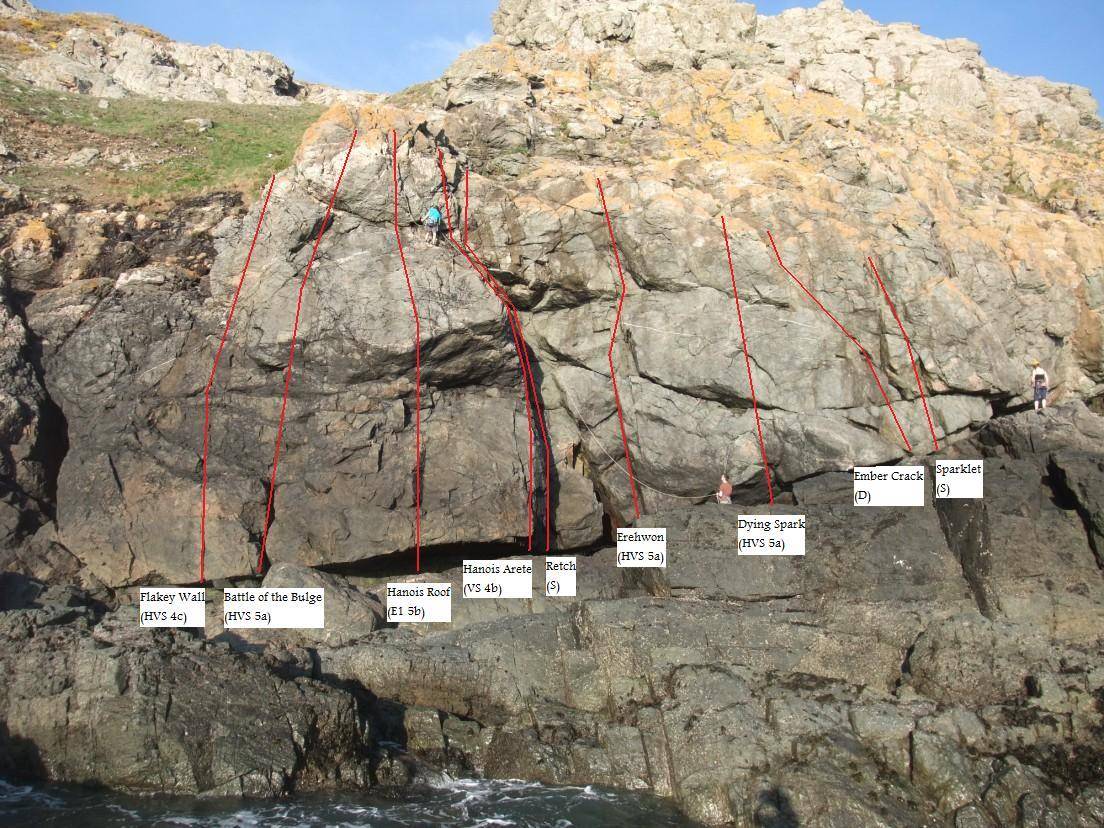
Topo B

Topo C

Topo D


 20m (66ft)
 Start at the left hand end of the undercut, 6 feet left of the wide crack. Climb up to and over the poorly protected wall on thin…
 20m (66ft)
 Climb the wide crack to the bulge. Over this to finish up thin cracks in the final pink overhang.

 20m (66ft)
 Start 15 feet to the right. Climb the large roof, finish up the steep wall. Could be a grade harder without a Friend 1.

 20m (66ft)
 Start on the arête 10 feet to the right. Climb to the right hand end of the roof, finish up the short wall.
20m (66ft) 10 feet to the right is an inverted V slot. The route follows the corner system just right of this, moving right over a thin quartz seam,…
18m (59ft) Start at the right hand end of the cave. Gain a small sloping ledge at 4 feet on the left. Climb directly up to and over the…
 18m (59ft)
 Start as for Dying Spark but follow the handcrack leftwards to finish as for Retch on the left hand side of the corner. May be much harder…
 18m (59ft)
 15 feet right of Dying Spark is a leftward trending crack. Follow this to finish up the brown corner.
14m (46ft) Start a few feet right of Ember Crack. Climb into the niche, and over the bulge on good holds to finish up the crack.
 20m (66ft)
 A few feet to the right is an arête. Gain this and continue up through a groove to the top. An easier alternative start is 10 feet…
 12m (39ft)
 10 feet to the right is a groove capped by an overhang. Climb to the roof, move right to finish. Something big appears to have fallen off…
 13
13 16484
16484 1149131168191127
 68
68 37
37 28
28 35
35 11
11 1
1 2
2 14124139171160
 58
58 58
58 26
26 2
2 6
6 10
10 13
13 7
7 7
7 2
2 1
1