

 6m (20ft)
 At the bottom of the approach path to Excalibur Buttress is a slightly overhanging wall. A short, but powerful route difficult to protect without a micro cam…
Herpin Rock Area
How do I get there?
Carpark location
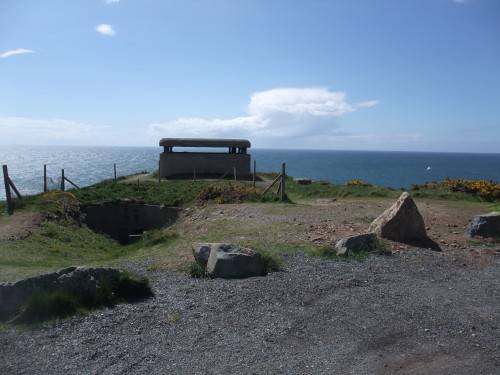
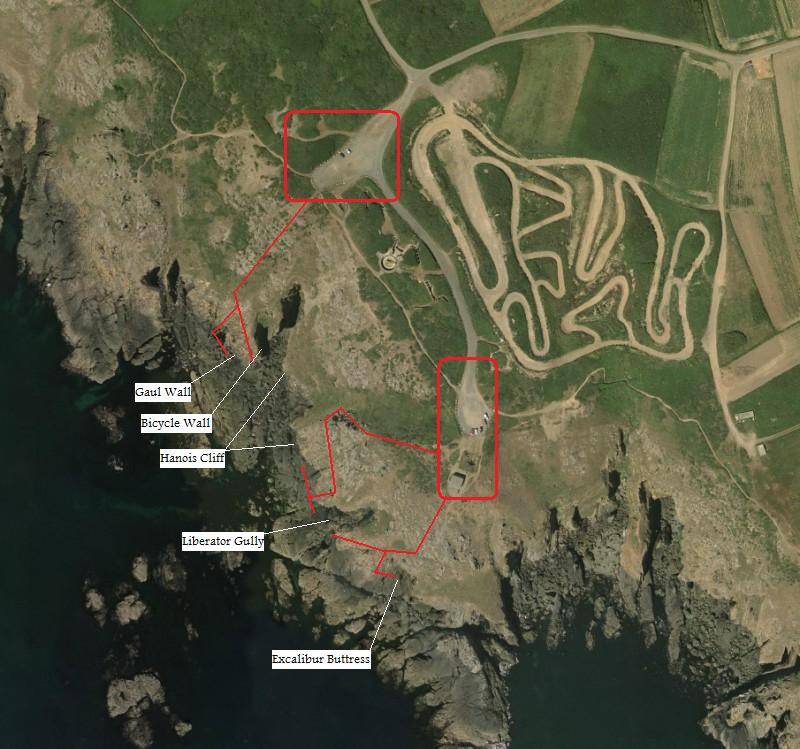
After parking by the bunker with the balanced roof in the photo above, head directly out from the bunker. Skirt rightwards until you come to some stakes to abseil into the crag, or continue right until a gully with a descent rope and some rock that resembles coco pops… Scramble down this gully and head left at the bottom until Excalibur Buttress comes into view.
Below are links to topos of the climbs at Excalibur Buttress:

Topo A

Topo B
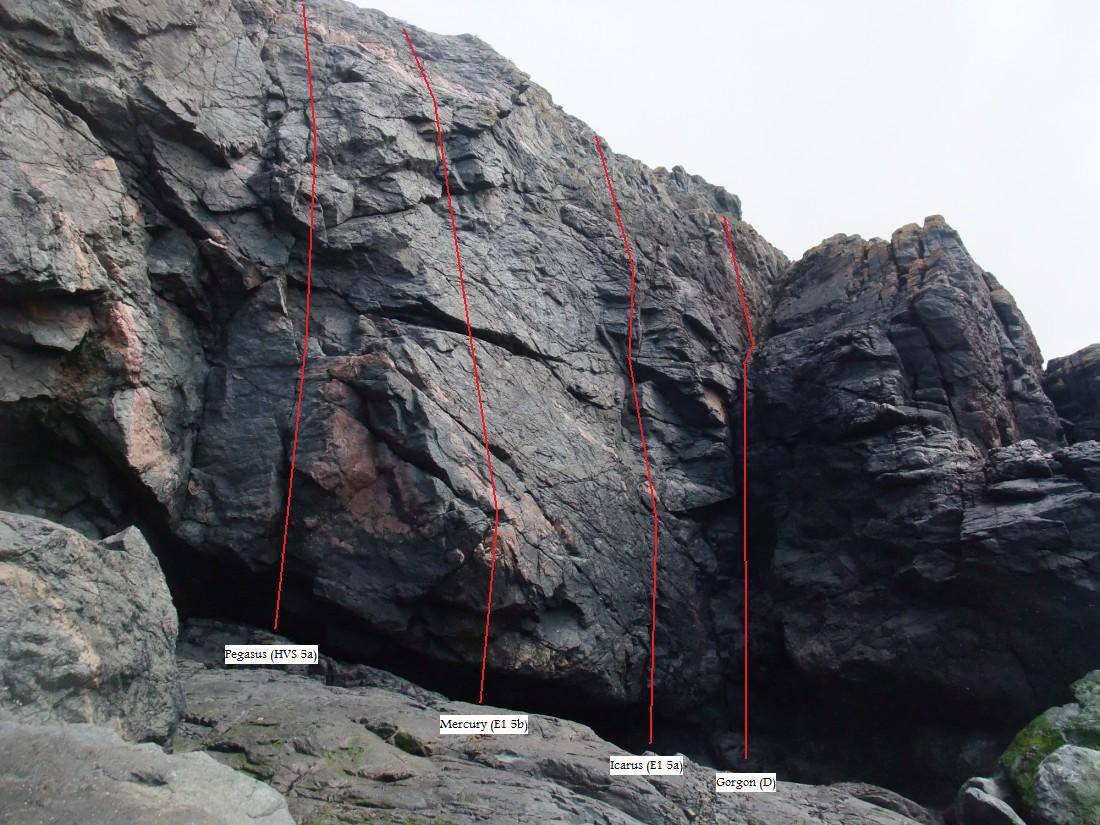
Topo C
 6m (20ft)
 At the bottom of the approach path to Excalibur Buttress is a slightly overhanging wall. A short, but powerful route difficult to protect without a micro cam…


 20m (66ft)
 Start 20 feet left of Salai at a thin crack above an undercut. Follow the crack for 40 feet, then move up and slightly right to a…

 20m (66ft)
 30 feet to the left of the large corner is a short corner. Climb this, trend leftwards to join a thin intermittent crack that continues leftward to…
 20m (66ft)
 Climb the right hand edge of the slab between Ashes to Ashes and Salai to join Salai at the top of the corner.

 25m (82ft)
 Stunning. High in the grade. Start as for Salai. Climb the short corner for 3 metres, move right beneath an overhang and reach a flake. Above is…
24m (79ft) An obvious challenge: the centre of the shield left of Excalibur. Some very hard moves low down lead to much easier, though run out climbing above. Start…
25m (82ft) Very hard and bouldery, and there’s a nervy finish too. Start 5 metres left of Excalibur beneath a vertical crack. Clip a peg (removed) in the crack;…

 25m (82ft)
 A pitch of mounting interest is extracted from the rib left of Excalibur. Protection is reasonable if a little spaced. Climb the corner of Excalibur for 7…
27m (89ft) A forceful lead up the huge overhanging wall right of Excalibur. Surprisingly, jugs abound, and (with the pegs pre-placed) the protection is fine. Start 5 metres right…
20m (66ft) Move up on good jugs to a sloping ledge at 12 feet. Climb the corner above (remains of an old peg), then move right to a ledge…
26m (85ft) A devious route with a touch of the DP’s. Climb the corner to the overhang, then move left 15 feet (crux). Move up and rightwards to gain…
 23m (75ft)
 A direct and superior version of Cabochon. Climb the corner of Cabochon to the roof. Bridge over this to join the final groove of Cabochon.
 23m (75ft)
 Climb the thin crack 6 feet right of the corner. Continue to the top keeping right of the groove.
23m (75ft) Gain the arête just to the right (a dynamic leap for porgs) and climb directly to the top through an awkward roof.
23m (75ft) Start at the right hand end of the triangular quartz vein between Mercury and Icarus. Make precarious moves over the undercut, then trend up and slightly left…
21m (69ft) Climb a difficult overhanging start to gain a thin crack. Follow this, then continue up the wall to the left of the overhangs. A hold snapped off…
75m (246ft) A R to L traverse of the cliff following the obvious break. Each pitch is harder than the last. Downclimb the nose to the south of Gorgon…
 15m (49ft)
 Take a rising left to right traverse starting from the scar. Climb up and right following the slabby rock beneath a bulge. Gain the top right hand…
15m (49ft) Start 15 feet down and to the right just above the water filled inlet. Climb up a miniature chimney feature with a scar at its foot, then…
12m (39ft) Start at the lowest point of the ledge below the cliff by two rock pools 10 feet right of E.P. Climb up just left of a crack,…
12m (39ft) 12 feet up and to the right is a wide crack with an open groove just to the left (this contains a triangular block). Climb the wall…
12m (39ft) Climb the steep corner/groove right of Broken Finger avoiding the final overhang by moving right.
 13
13 1
1 64
64 84
84 1149
1149 13116819112768372835
 11
11 1
1 2
2 14
14 124139171160585826
 2
2 6
6 10
10 13
13 7
7 7
7 2
2 1
1